Being able to secure a server is one thing, but what can you do to ensure that you know and can track when a server is accessed? With the predominance of Slack in the workplace, it makes sense to log access to a dedicated channel there. It is easy to receive notifications using Slack’s desktop, mobile and web clients. Thus, not only can I see when servers are accessed, but so too can my team. This article documents how we went about configuring SSH Login Notifications Using a Slack App.
There are many how-to documents on the web describing how to configure Slack Notifications for logins to Bastion and Unix-based servers. Unfortunately, all of the ones I found were suggesting one use the legacy Custom Integration path that once was the go-to path for these types of integrations. Today, Custom Integrations are no more and Slack Apps are the way to go. So in this article, I am going to walk you through the creation of a simple Slack App that can be used to notify when a user logs into a server.
Create the Slack App
To create your Slack App go to https://api.slack.com/apps. If you have not created a Slack App before then after you have logged in you will see this:
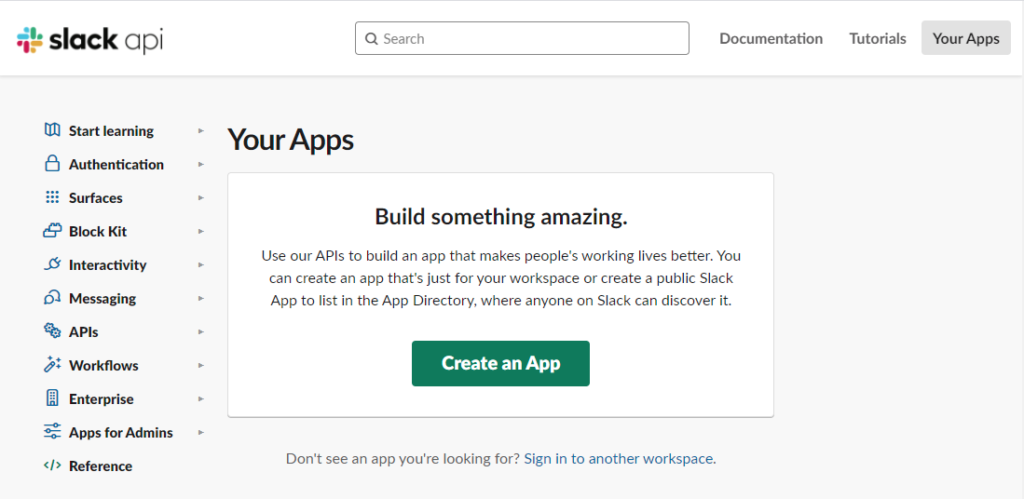
Click on the “Create an App” button to get started. The next screen provides asks you to name your App and choose the Development Slack Workspace that it should reside in. For our example, we’ll call our App “SSH Login Notifier” and select the DAMGeeks Slack Workspace.

Having named your app and selected a Workspace, click “Create App”.
Now that the App has been created, it is time to add a feature using the Basic Information screen.
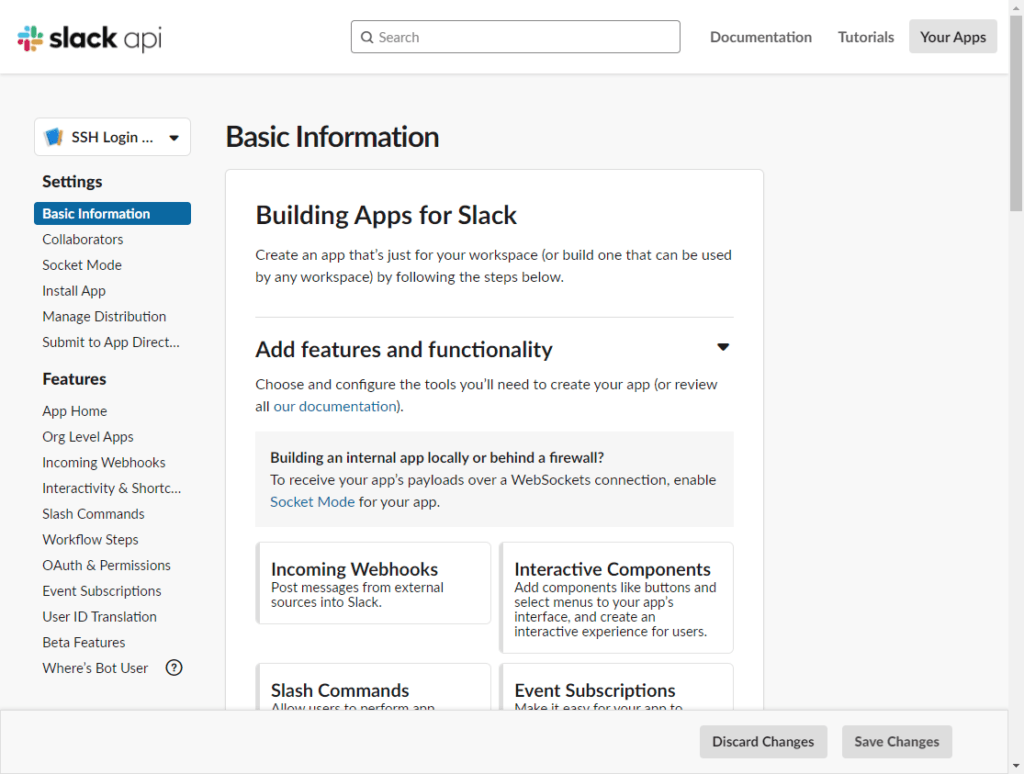
Click on “Incoming Webhooks” to create a webhook that can be used by our server for the notification needed. On the next screen, click on the toggle to Activate Incoming Webhooks.
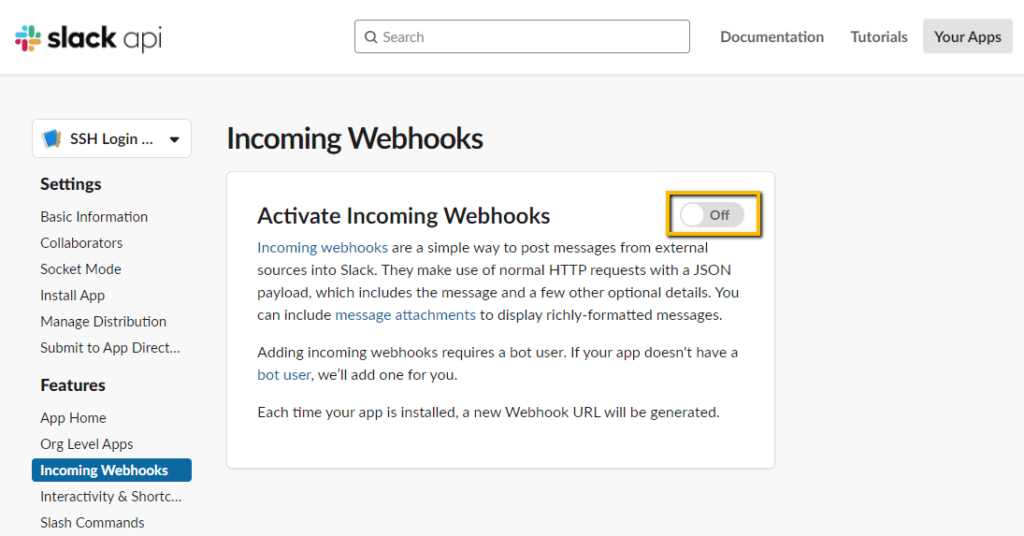
After activation, scroll to the bottom of the screen and click on the “Add New Webhook to Workspace” button.

Next, choose the channel that the new App is going to post to. If the channel you want to use does not exist, open Slack and create it, then use the type-ahead to find your channel quickly, even if you created it after the initial page load.
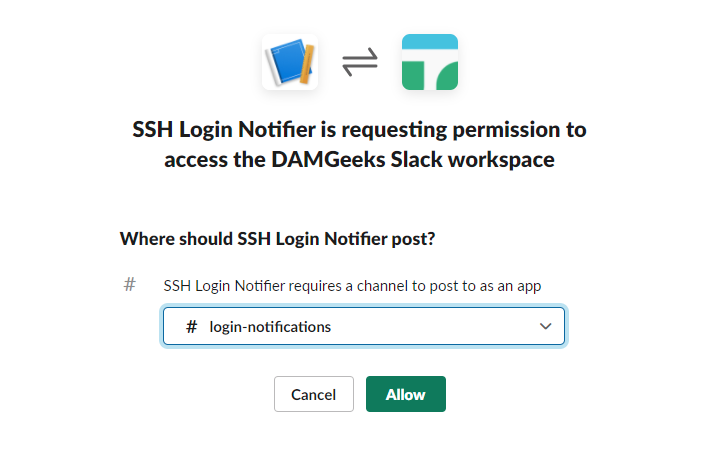
Click on “Allow” to grant your Slack App access to the channel. And voila! You now have your webhook created and ready to use. Click on the “Copy” button to put it on your clipboard ready to paste into your script that will be run for each SSH login.
Create SSH Script on your Server
As with the Next, create your SSH notification script on your server. Your script should be created in /etc/ssh/scripts and should be given a meaningful name sshnotifier.sh. The script needs execute permissions added – chmod +x /etc/ssh/scripts/sshnotifier.sh.
sshnotifier.sh
#!/bin/shif [ "$PAM_TYPE" = "open_session" ]; thenurl="https://hooks.slack.com/services/../../.." #[Paste the webhook URL copied earlier]host="$(hostname)"generate_post_data(){cat <<EOF{"blocks": [{"type": "section","text": {"type": "mrkdwn","text": "SSH login by user: *$PAM_USER*"}},{"type": "section","fields": [{"type": "mrkdwn","text": "*Connected to Host:* $host"},{"type": "mrkdwn","text": "*Connected from Host:* $PAM_RHOST"}]}]}EOF}curl -X POST -H 'Content-type: application/json' --data "$(generate_post_data)" $urlfiexit
There are a couple of things to note with the shell script:
- To use it you will need to have PAM installed (apk add Linux-pam) and enabled with SSH by updating /etc/ssh/sshd_config such that it has UsePAM yes. If you are using Alpine it boots fast enough that it is easy to just reboot rather than restart services to have your changes in place, but you can decide what is best for you.
- You will need CURL if not installed (apk add curl)
- You need to put your WebHook URL into the script on line 3.
- The EOF must be at the start of the line to close out the stream; I made the mistake of leading tabs before my EOF and did not enjoy the “
syntax error: unexpected end of file (expecting "}")” error that resulted.
I found the scripts included in the existing guides to be difficult to read and used prior versions of Slack’s API for messages. Updating the message composition methodology to use a function to form the JSON passed to CURL makes it possible to format it in a more human-readable fashion. This makes it easier to avoid errors leading to invalid JSON. The script is set up to send the notification on the open_session event, which captures when the user logs in. The examples I found and reference later in this article rely on the close_session event. If this is more to your way of thinking, update the if statement as below:
if [ "$PAM_TYPE" != "close_session" ]; then
Slack’s Block Kit Builder is a useful tool that can guide you in customizing your notification. Visit this page on the Slack website to dig in – https://app.slack.com/block-kit-builder
Add Script to PAM.D
Configure the PAM module to execute our script by updating your /etc/pam.d/ssh file; if it does not exist, create it.
sudo echo "session optional pam_exec.so seteuid /etc/ssh/scripts/sshnotifier.sh" >> /etc/pam.d/sshdTime to Test
It is time to test your handy work now that you have everything set up. Validate you’re receiving notifications in your configured Slack channel by logging in using SSH. Now you have in place SSH Login Notifications Using a Slack App, congratulations!
Credits
I took guidance from a couple of articles posted by others to create this updated how-to. Have a look at them too, I am sure their authors would be happy for the traffic:
- Lyal Avery tackled this on PullRequest in 2018 that article is no longer available after a site refresh but there’s lots of good content to review there.
- Raja Venkataraman discussed this on Medium in 2019.
These articles from 2018 and 2019 started me on my journey towards solving this today. While much has changed since Lyal and Raja’s articles were published they helped me find my starting point. This update to the process, including its updated steps and scripts, will help you keep your projects moving forward.